Tuesday, November 8, 2016

Mac Technique: How to install Windows Support Software without Boot Camp icon in Windows 10

Recently I upgraded the OS of a MacBook Pro to macOS Sierra 10.12.1 and then install Windows 10 with Boot Camp Assistant (Applications->Utilities->Boot Camp Assistant). Windows was easily installed, but not the Windows drivers for Mac.

The "Open Boot Camp Help" option in macOS's Boot Camp Assistant says that Boot Camp icon/Boot Camp Control Panel is required for the configuration of hardware in Windows:


Unfortunately, I couldn't to find the Boot Camp icon/Boot Camp Control Panel in Windows. Without proper drivers installed in Win 10, the Wi-Fi function did not work. This is a really big problem!!

After searching for the solution for a couple of days, I found this:

No option to download windows support software for Bootcamp Assistant

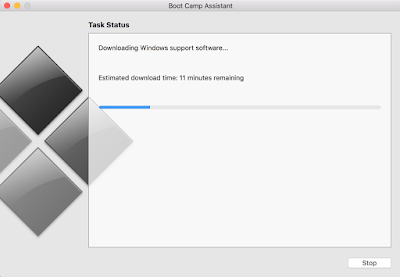
So I followed it to select Boot Camp Assistant->Action->Download Windows support software:


It takes a while for the download.


I store the Windows Support Software in a USB drive.

After booting in Windows, I simply select the Windows Support Software at USBDrive\WindowSupport\BootCamp\Setup and the drivers are then successfully installed. The Wi-Fi function then works normally.

The Apple Software Update also shows up automatically after installing the Windows drivers and rebooting Windows.

Saturday, November 5, 2016

Mac Technique: External keyboard configuration for Ctrl+C Copy hotkey

To use the windows style copy (Ctrl+C) or paste (Ctrl+V) hotkeys with an external USB keyboard connecting to a Mac, modify the keyboard settings as below:

Select System Preferences -> Keyboard -> Modifier Keys...

Make sure the USB keyboard is selected and modify the command and control keys as below:


Tuesday, October 11, 2016

Mac Technique: Refresh a network folder in Finder

[command] + [up]

then

[command] + [down]     OR    Click the network folder with a mouse.

Monday, September 26, 2016

Mac Technique: Arrange bookmarks of Chrome brower in alphabetical order

When I tried to sort my Mac's Chrome bookmarks in order with this procedure:

Select => Bookmarks => Bookmarks Manager => Organize => Reorder by title

The bookmarks are sorted in order.

However, if I turned off the Chrome app and restarted it. The alphabetical order of bookmarks was gone!

Then I find a solution from:

How do I arrange bookmarks in order? (Google Chrome Help Forum)

I simply:

1. Do this same step as before:

Select  => Bookmarks => Bookmarks Manager => Organize => Reorder by title

2. Cut all the reordered bookmarks and paste them back immediately.

Then the bookmarks are arranged in order even after the restart of the Chrome app!!

Wednesday, September 21, 2016

Mac Technique: Extended Desktop and Mirror Display Switch Hotkey

Hotkey to switch between extended desktop and mirror display:
延伸桌面與鏡像顯示的切換快捷鍵:

[command] + [F1]

Monday, September 5, 2016

Mac Technique: Force to terminate an app

When an app cannot be closed with the right mouse click, try this:

Press [option]+[command]+[esc]

Then choose the app to be terminated in the pop-up menu and select Force Quit.

Monday, August 22, 2016

Xcode Tip: A powerful hotkey/shortcut to format the indentation of multiple lines

To quickly format the code indentation, simply:

1. Select the text to be adjusted.
2. press (control) + (i) .

Animated example of the (control) + (i)  hotkey:


The (control) + (i) behaviour is the same as the Editor -> Structure -> Re-Indent selection.


Related Information:

Fix code indentation in Xcode
Xcode Tip: Hotkeys/Shortcuts to move multiple lines horizontally (command ⌘) + ( [ ) or ( ] ) 
Xcode Tip: Comment Hotkey/Shortcut

Wednesday, July 27, 2016

Marker Clustering with Google's Utility library for Maps SDK (Google-Maps-iOS-Utils)

This tutorial shows how to group multiple map markers with Marker Clustering utility library provided by Google-Maps-iOS-Utils(V1.0.1), which requires Google Maps SDK for iOS (V2.0). This tutorial is created in Swift 2.2 with Xcode 7.3.1. The following screenshots show a lot of map markers and the clustering results using GMUClusterManager with default circles or custom images.


Follow these steps:

1. Install CocoaPods as the dependency manager.

Type this command in the terminal:

sudo gem install cocoapods

2. Create a Single View Application project with Xcode and close it.

3. Go to the Xcode project directory in the terminal, type pod init or nano Podfile to create a Podfile and save it as:


platform :ios, '9.0'
target "ProjectName" do
    pod 'GoogleMaps'
    pod 'Google-Maps-iOS-Utils'
end

4.  Type this terminal command:

pod install

You should see something like this in the terminal:


If your GoogleMaps is an old version, update it with this terminal command:

pod update

5. Open the projectName.xcworkspace file just automatically created. (Don't open the original .xcodeproj file)


6. Add a temporary Objective-C file to your project. You may give it any name you like, e.g. Temp.m.


Select Create Bridging Header.


7. Delete the temporary Objective-C file (Temp.m) you just created.

8. In the projectName-Bridging-Header.h file just created, add this line:

#import <Google-Maps-iOS-Utils/GMUMarkerClustering.h>

9. Get the iOS API key like AIza................... from Google Developers Console. (For more details, see Step 6 of the Using Google Maps SDK for iOS in Swift tutorial.

10. Edit the AppDelegate.swift file:
    func application(application: UIApplicationdidFinishLaunchingWithOptions launchOptions: [NSObjectAnyObject]?) -> Bool {
        
        GMSServices.provideAPIKey("AIza....") //iOS API key
        
        return true

    }

10. Modify ViewController.swift as below:


import UIKit

class ViewController: UIViewController, GMSMapViewDelegate, GMUClusterManagerDelegate {
    
    private var mapView : GMSMapView!
    private var clusterManager: GMUClusterManager!
    
    //true - marker clustering / false - map markers without clustering
    let isClustering : Bool = true
    
    //true - images / false - default icons
    let isCustom : Bool = false
    
    override func viewDidLoad() {
        super.viewDidLoad()
        
        mapView = GMSMapView(frame: view.frame)
        
        //Default position at Chungli (Zhongli) Railway Station, Taoyuan, Taiwan.
        mapView.camera = GMSCameraPosition.cameraWithLatitude(24.953232, longitude: 121.225353, zoom: 12.0)
        
        mapView.mapType = kGMSTypeNormal
        mapView.delegate = self
        
        view.addSubview(mapView)
        
        if isClustering {
            var iconGenerator : GMUDefaultClusterIconGenerator!
            if isCustom {
                var images : [UIImage] = []
                for imageID in 1...5 {
                    images.append(UIImage(named: "m\(imageID).png")!)
                }
                iconGenerator = GMUDefaultClusterIconGenerator(buckets: [ 10, 50, 100, 200, 500 ], backgroundImages: images)
            } else {
                iconGenerator = GMUDefaultClusterIconGenerator()
            }

            let algorithm = GMUNonHierarchicalDistanceBasedAlgorithm()
            let renderer = GMUDefaultClusterRenderer(mapView: mapView, clusterIconGenerator: iconGenerator)
            
            clusterManager = GMUClusterManager(map: mapView, algorithm: algorithm, renderer: renderer)
            
            generateCoord(true)
            
            // Call cluster() after items have been added to perform the clustering and rendering on map.
            clusterManager.cluster()
            
            // Register self to listen to both GMUClusterManagerDelegate and GMSMapViewDelegate events.
            clusterManager.setDelegate(self, mapDelegate: self)
        } else {
            generateCoord(false)
        }
    }
    
    /// Point of Interest Item which implements the GMUClusterItem protocol.
    class POIItem: NSObject, GMUClusterItem {
        var position: CLLocationCoordinate2D
        var name: String!
        
        init(position: CLLocationCoordinate2D, name: String) {
            self.position = position
            self.name = name
        }
    }

    func generateCoord(isCluster: Bool) {
        
        let latitudeMin   : Double = 24.79
        let latitudeMax   : Double = 25.10
        let latitudeDiff  : Double = latitudeMax - latitudeMin
        let longitudeMin  : Double = 120.99
        let longitudeMax  : Double = 121.50
        let longitudeDiff : Double = longitudeMax - longitudeMin
        
        for count in 1...5000 {
            
            let latitude  = latitudeMin  + Double(arc4random()%10000)/10000*latitudeDiff
            let longitude = longitudeMin + Double(arc4random()%10000)/10000*longitudeDiff
        
            let position = CLLocationCoordinate2D(latitude: latitude, longitude: longitude)
            
            if isCluster {
                let item = POIItem(position: position, name: "#\(count)")
                
                clusterManager.addItem(item)
            } else {
                let marker = GMSMarker(position: position)
                marker.title = "#\(count)"
                marker.map = mapView
            }
        }

    }
    
    func clusterManager(clusterManager: GMUClusterManager, didTapCluster cluster: GMUCluster) {
        let newCamera = GMSCameraPosition.cameraWithTarget(cluster.position,
                                                           zoom: mapView.camera.zoom + 1)
        let update = GMSCameraUpdate.setCamera(newCamera)
        mapView.moveCamera(update)
    }
    
    //Show the marker title while tapping
    func mapView(mapView: GMSMapView, didTapMarker marker: GMSMarker) -> Bool {
        let item : POIItem = marker.userData as! POIItem

        marker.title = item.name
        
        mapView.selectedMarker = marker
        
        return true
    }
    
    //Optional Feature:
    //Add new markers while tapping at coordinates without markers/clusters
    func mapView(mapView: GMSMapView, didTapAtCoordinate coordinate: CLLocationCoordinate2D) {
        
        let item = POIItem(position: coordinate, name: "NEW")
        
        clusterManager.addItem(item)
        
        clusterManager.cluster()
    }
    
    override func didReceiveMemoryWarning() {
        super.didReceiveMemoryWarning()
    }

}

The above code is modified from Google's ViewController.swift of the SwiftDemoApp.

11. Add the file image files below to the Xcode project:

https://github.com/googlemaps/google-maps-ios-utils/tree/master/app/Resources/Images

12. Edit the Info.plist file (Required for Xcode 7 and iOS 9):

Key: LSApplicationQueriesSchemes
Type: Array

Key: Item 0
Type: String
Value: googlechromes

Key: Item 1
Type: String
Value: comgooglemaps


Without modifying Info.plist, you'll get


Pressing the Google logo on the map in the iOS simulator shows:


-canOpenURL: failed for URL: "comgooglemaps://" - error: "This app is not allowed to query for scheme comgooglemaps"


-canOpenURL: failed for URL: "googlechromes://" - error: "This app is not allowed to query for scheme

This is because the iOS simulator does not include Google Maps and Chrome apps. So check this feature with a device.


13. Run the code. You should see result like this:


14. Set isCustom as true to see the custom clustering images:

    //true - images / false - default icons
    let isCustom : Bool = true


15. Try tap at different locations on the map to add new markers:


Related Information:

Marker Clustering
Google-Maps-iOS-Utils(GitHub)
Google Maps SDK for iOS
CocoaPods Tutorial - Google Maps SDK for iOS

Monday, July 25, 2016

iOS Simulator Tip: Map Zoom/Orientation Adjustment Hotkey

To adjust the zoom/orientation for a map in the iOS simulator, simply hold the option/alt key and two gray circles should appear on the map. Then simple click and drag the mouse to zoom in/zoom out or rotate the map.


Tuesday, July 19, 2016

CLLocationDistance - Distance between two locations/coordinates

The following code finds out the distance between two coordinates. It is written with Xcode 7.3.1 playground. The distance is in meters.

import MapKit

let location1 = CLLocation(latitude: 24.953232, longitude: 121.225353)
let location2 = CLLocation(latitude: 24.9511, longitude: 121.2358)

let distance : CLLocationDistance = location1.distanceFromLocation(location2)


print("distance = \(distance) m")

where CLLocationDistance is the same as Double:

typealias CLLocationDistance = Double

Monday, July 11, 2016

Reverse Array in Swift 2.2/3.0

To reverse an array in Swift 2.2 with Xcode 7.3.1:

var array = ["a","b","c","d","e","f","g"]
        
array = array.reverse()
        

print(array)

To reverse an array in Swift 3 with IBM Swift Sandbox (Swift 3.0 June 20, 2016):

var array = ["a","b","c","d","e","f","g"]

array = array.reversed()


print(array)

Result:


Tuesday, July 5, 2016

Xcode Tip: Manage Apple ID with Xcode

To add/remove Apple IDs to Xcode, follow these steps:

1. Run Xcode.


2. Select Xcode->Preferences


3.Select Accounts ->  + sign -> Add Apple ID

4. Enter the Apple ID (email address) and password. Select Sign In.


5. The account information of the Apple ID is shown. You should see the team and role information as below.


Tuesday, June 28, 2016

Mac Technique: Select Emoji with hotkey

How to type the "Dog Face" with a Mac?

Just select [control] + [command] + [space] in a text field.

Then select the Emoji as below:


Monday, June 20, 2016

Mac Technique: Search for File Types in Finder

To search for a certain file type in Finder, type:

kinds:fileType

and then select the desired file type displayed below the search text.

Examples:


kind:rtf


kind:movie


Reference:

How to Search & Find Specific File Types & File Formats in Mac OS X

Tuesday, June 7, 2016

Select the iOS device or bluetooth audio output with action sheet

While playing a sound file with AVAudioPlayer, the following code may be used to select the audio output between the speaker of an iPhone/iPad or the bluetooth headset in an action sheet:


let buttonOutput = UIButton(frame: CGRectMake(0, 0, 200, 30))
buttonOutput.center = CGPointMake(view.center.x, view.center.y+200)
buttonOutput.setTitle("Output", forState: UIControlState.Normal)
buttonOutput.setTitleColor(UIColor.blueColor(), forState: UIControlState.Normal)
buttonOutput.setTitleColor(UIColor.cyanColor(), forState: UIControlState.Highlighted)
buttonOutput.addTarget(self, action: #selector(buttonOutputPressed), forControlEvents: UIControlEvents.TouchUpInside)

view.addSubview(buttonOutput)

and

func buttonOutputPressed() {
        
    let model = UIDevice.currentDevice().model
        
    let session = AVAudioSession()
        
    let controller = UIAlertController(title: "Select Output", message: "", preferredStyle: UIAlertControllerStyle.ActionSheet)
        controller.addAction(UIAlertAction(title: model, style: UIAlertActionStyle.Default, handler: { action in
    do {
        try session.setCategory(AVAudioSessionCategoryPlayAndRecord, withOptions: AVAudioSessionCategoryOptions.DefaultToSpeaker)
    } catch {
        print("AVAudioSession error!")
    }
    }))
    controller.addAction(UIAlertAction(title: "Bluetooth", style: UIAlertActionStyle.Default, handler: { action in
    do {
        try session.setCategory(AVAudioSessionCategoryPlayAndRecord, withOptions: AVAudioSessionCategoryOptions.AllowBluetooth)
    } catch {
        print("AVAudioSession error!")
    }
    }))
    presentViewController(controller, animated: true, completion: nil)
}

Result: